00:00
00:00
Pahgawk
I'm a computer graphics programmer who occasionally still makes art.

Dave Pagurek @Pahgawk

Age 30, Male

UBC

Toronto, Canada

Joined on 2/8/09

Level:
7
Exp Points:
510 / 550
Exp Rank:
> 100,000
Vote Power:
4.95 votes
Art Scouts
1
Rank:
Civilian
Global Rank:
80,998
Blams:
6
Saves:
74
B/P Bonus:
0%
Whistle:
Normal
Trophies:
34
Medals:
69

Pahgawk's News

Posted by Pahgawk - August 1st, 2026


I recently made this animation: https://www.newgrounds.com/portal/view/1044662


It's maybe not too crazy on the surface but it's made in a pretty different way than usual, and I'm hoping there's other people out there for whom this might be kinda interesting, so I wanted to explain a bit about how it works!


So all the visuals in this are p5.js sketches! p5.js is a graphics library aimed at artists, with the goal of making programmatic visuals as accessible as possible, designed for experimentation and iteration rather than like, engineering something to a specification. It's often used to teach programming because of all that. My day job is at Butter, a modular video editor, where the idea there is that all the components you can use are p5.js code. That makes it very extensible, so no asset is ever fully "dead" or locked in, as the code can easily expose controls for you. Mostly we've been using that to easily create new customizable blocks for users of Butter, but for a while, it's been clear to me that p5.js artists could be using this to create something new. There have been a lot of great tools popping up using creative code as a performance medium, but I see Butter doing something similar for more planned productions that need nonlinear editing.


So I finally got the opportunity to make something like that recently thanks to Butter doing a bigger push for features for coders, the addition of keyframing of sketch inputs, us needing to test slightly longer projects, and just having a compatible video idea. So here we are, testing this all out with some mild health/body horror!


Structuring a project


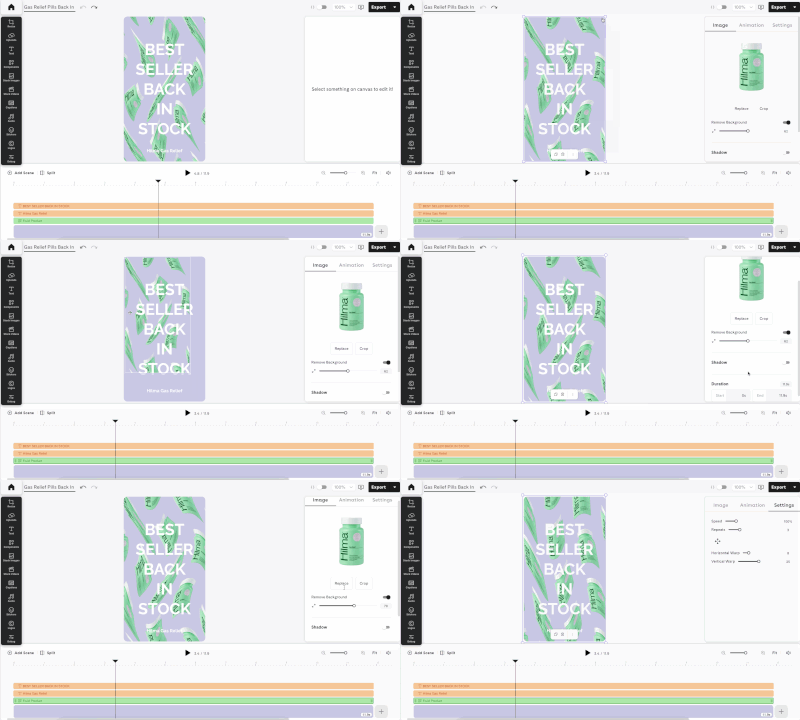
Butter should look familiar to anyone who's used any other video editor: there's a timeline, with pills on it representing each thing in the project. You can add new things from some menus on the left. The first menu item is the Build tab, which lets you add a new code component. This pops open a code editor!


iu_1642847_2731551.webp


So each thing in the timeline for my project is an editable p5.js sketch. If you createCanvas(windowWidth, windowHeight), normally used to make a p5 canvas that fills the window, then Butter will let you resize it on canvas freely. (Fixed-size canvases can still be scaled uniformly.)


iu_1642848_2731551.gif


You can also stack multiple sketches! If each sketch draws an object, you can position the different objects into a scene. But you can also stack full-screen sketches as filters. In this project, most of my sketches are black and white, and then I reuse a sketch that goes on top of all of those that applies a slight blur and applies a gradient map to recolor the content.


iu_1642849_2731551.gif


The code for the above is a pretty simple p5.strands shader, making some some color pickers and passing their values in:


let remap

let blur
let c1, c2, c3, c4

async function setup() {
  createCanvas(windowWidth, windowHeight, WEBGL);

  blur = createSlider(0, 40, 10, 0.1)
  c1 = createColorPicker('#000')
  c2 = createColorPicker('#B11')
  c3 = createColorPicker('#FB1')
  c4 = createColorPicker('#fff')
  
  remap = buildFilterShader(() => {
    let c1v = uniformVec4(color(c1.value()))
    let c2v = uniformVec4(color(c2.value()))
    let c3v = uniformVec4(color(c3.value()))
    let c4v = uniformVec4(color(c4.value()))
    filterColor.begin()
    let lum = (rgb) => dot(rgb, [0.2126, 0.7152, 0.0722])
    let v = getTexture(filterColor.canvasContent, filterColor.texCoord)
    let progress = lum(v.rgb)
    let out = c1v
    if (progress < 0.333) {
      out = mix(c1v, c2v, map(progress, 0, 0.333, 0, 1))
    } else if (progress < 0.666) {
      out = mix(c2v, c3v, map(progress, 0.333, 0.666, 0, 1))
    } else {
      out = mix(c3v, c4v, map(progress, 0.666, 1, 0, 1, true))
    }
    filterColor.set(out)
    filterColor.end()
  })
}

function draw() {
  clear()
  drawParentToCanvas()
  filter(BLUR, blur.value())
  filter(remap)
}

The way that it can apply this filter to the contents of another sketch rather than completely drawing its visuals from scratch is through the use of the Butter-specific function drawParentToCanvas(), which draws everything below the sketch on the timeline onto the sketch's canvas where it can be processed further.


Note also that regular p5.js sliders and inputs get turned into editable fields when you select the sketch! You can also add keyframes to most fields if you want a slider value to change over time. If you use orbitControl(), that's keyframeable too, and I used that a bit to animate camera movements in a few scenes.


If your sketch draws fully from scratch every frame based only on time variables like frameCount or millis(), you can seek anywhere instantly. But even for sketches that update incrementally from frame to frame, such as a physics simulation, you can still scrub back through time, and it will load for a moment and then show you the right frame.


Scene breakdowns

That's what you can do in Butter generally, but now let's look at a few scenes, which are still just standalone p5.js sketches.


Folds

iu_1642850_2731551.gif

This one is a single filter shader, using some domain warping on noise to produce the folds. A bulge is applied by pushing the coordinates out away from the location of the circle int he center. The bands come from fract(abs(coord.x) / 50), taking a number that goes from 0 up to a few hundred, and then making it go from 0-1 and repeat again every approximately 50 pixels (approximately, because this is a warped coordinate.)

let bulge
async function setup() {
  createCanvas(windowWidth, windowHeight, WEBGL);
  bulge = buildFilterShader(() => {
    filterColor.begin()
    noiseDetail(4, 0.5)
    let coord = (filterColor.texCoord - 0.5) * filterColor.canvasSize * 2

    let origCoord = coord
    let tOff = [0, frameCount * 2.5]
    coord = coord + tOff
    let s = 0.001
    coord = coord + ([
      noise(coord.x*s, coord.y*s, 0),
      noise(coord.x*s, coord.y*s, PI)
    ] - 0.5) * 200

    let pos = 5 * [sin(frameCount * 0.05), sin(frameCount*0.07)]
    let toPos = pos - origCoord
    let len = length(toPos)
    coord = mix(coord, pos, 1-smoothstep(0, 180, len))

    let outColor = 0.5 * (1 + sin(coord.x))
    if (len < 45) {
      outColor = 0.9
    } else if (abs(coord.x) < 20) {
      outColor = 0
    } else {
      outColor = mix(fract(abs(coord.x) / 50), 0, 0.5)
    }
    filterColor.set([outColor, outColor, outColor, 1])
    filterColor.end()
  })
}
function draw() {
  clear()
  filter(bulge)
}


Bellows

iu_1642851_2731551.gif

I particularly liked how this one turned out. It uses a material shader to (1) wrinkle and (2) inflate some spheres.


The wrinkling is just using some noise to offset the vertices of the sphere. However, you can't just move the vertex positions: you also need to update the normals in order for the lighting to be correct. I made a library for this in the past for something more robust, but if you can come up with two direction vectors u and v that are perpendicular to a surface, and you have a function warp(pt) that you're using to adjust the positions of a point, then you can pick a small value h and approximate the new normal as:


normal = normalize(cross(
  (warp(pt + h*u) - warp(pt)) / h,
  (warp(pt + h*v) - warp(pt)) / h
))

Then to do the inflation, I just apply less noise the more inflated the sphere is, making it closer to a perfect sphere, and I also extend the sphere out along its normal.


let pulse
async function setup() {
  createCanvas(windowWidth, windowHeight, WEBGL);
  pulse = buildMaterialShader(() => {
    worldInputs.begin()
    noiseDetail(4, 0.5)
    let s = 0.005
    let pulseAmount = uniformFloat()
    let amt = mix(0, 50, 1 - pulseAmount)
    let extrude = mix(0, 30, pulseAmount)
    let warp = (pt) => {
      return pt + ([
        noise(pt*s + 123.456),
        noise(pt*s + 456.123),
        noise(pt*s + 264.891)
      ] - 0.5) * amt
    }

    let d = 1
    let up = abs(worldInputs.normal.y) > 0.9 ? [1, 0, 0] : [0, 1, 0]
    let u = normalize(cross(worldInputs.normal, up))
    let v = cross(worldInputs.normal, u)
    const wc = warp(worldInputs.position)
    const wu = warp(worldInputs.position + u * d)
    const wv = warp(worldInputs.position + v * d)
    worldInputs.position = wc
    
    let n = normalize(cross((wu-wc)/d, (wv-wc)/d))
    worldInputs.normal = n
    worldInputs.position += n * extrude
    worldInputs.end()
  })
}
function draw() {
  randomSeed(1)
  background(0)
  noStroke()
  push()
  let v = 200
  directionalLight(v, v, v, 0, 0, -1)
  directionalLight(255, 255, 255, 1, 0, 1)
  directionalLight(255, 255, 255, -1, 0, 1)
  orbitControl()
  shader(pulse)
  for (let i = 0; i < 5; i++) {
    push()
    let p = pow(
      0.5 * (
        sin(-PI/2 + frameCount * 0.03 + i*0.05) + 1
      ),
      2
    ) + 0.05*(1+sin(frameCount*0.12 + i * 0.1))
    pulse.setUniform('pulseAmount', p)
    emissiveMaterial(50 + 50 * p)
    translate(
      random(-1, 1) * width/2,
      random(-1, 1) * height/2,
      random(-2, 1.1) * width,
    )
    sphere(30, 50, 50)
    pop()
  }
  pop()
}

Buildings

iu_1642852_2731551.gif


This one has two parts: a material shader for the clouds, and a material shader for the buildings.


The clouds are just a plane where I've used a p5.strands shader to make a cloud texture with noise. The noise is just used to mix between blue and white. I also make it fade to white at the end where I know the horizon will be.


The buildings use p5.strands instancing. A building's geometry is actually just one floor. When I draw it with multiple instances, the shader offsets each instance vertically. I just increase the number of instances over time to make them grow.


let clouds
let buildings
let seed
let buildingShader

let sceneStartTime
const sceneDuration = 5000

async function setup() {
  createCanvas(windowWidth, windowHeight, WEBGL)

  clouds = buildMaterialShader(() => {
    pixelInputs.begin()
    noiseDetail(4, 0.8)
    pixelInputs.color = mix(
      [0.5, 0.6, 1, 1],
      [1, 1, 1, 1],
      map(
        noise([
          pixelInputs.texCoord * 10 + [1, 2] * millis() * 0.0005,
          millis() * 0.0003
        ]),
        0.3,
        0.8,
        0,
        1,
        true
      )
    )
    pixelInputs.color = mix(pixelInputs.color, [1, 1, 1, 1], smoothstep(0.5, 0, pixelInputs.texCoord.y))
    pixelInputs.end()
  })

  buildingShader = buildMaterialShader(() => {
    let h = uniformFloat()
    worldInputs.begin()
    worldInputs.position.y -= h * instanceID()
    worldInputs.end()
  })

  resetScene()
}

function resetScene() {
  seed = random(1000000)
  randomSeed(seed)
  sceneStartTime = millis()

  push()
  colorMode(HSB, 1, 1, 1)

  buildings = []

  for (let i = 0; i < 60; i++) {
    const building = {}

    const h = random(50, 90)
    const w = random(100, 200)
    const d = random(100, 200)
    const numFloors = floor(random(10, 40))
    const rate = random(0.5, 5)

    const brickColor = color(random(), random(0.1), random(0.4, 0.8))
    const windowColor = color('#447')

    const windowH = random(0.5, 0.9) * h
    const numWindows = floor(random(5, 15))
    const windowW = w / numWindows * random(0.7, 0.95)

    const floorGeom = buildGeometry(() => {
      noStroke()

      fill(brickColor)
      box(w, h, d)

      fill(windowColor)
      translate(0, 0, d / 2)

      for (let j = 0; j < numWindows; j++) {
        push()
        translate(map(j + 0.5, 0, numWindows, -w / 2, w / 2), 0)
        box(windowW, windowH, 2)
        pop()
      }
    })

    const z = random(300, 8000)
    const x = random(-1, 1) * width * 3 * map(z, 0, 8000, 1, 3)
    const y = 0

    const draw = () => {
      push()

      translate(x, y, -z)

      buildingShader.setUniform('h', h)

      const elapsed = (millis() - sceneStartTime) / 1000
      model(floorGeom, min(numFloors, ceil(elapsed * rate)))

      pop()
    }

    buildings.push({ draw })
  }

  pop()
}

function draw() {
  if (millis() - sceneStartTime > sceneDuration) {
    resetScene()
  }

  background(255)
  orbitControl()
  noStroke()

  push()
  translate(0, -200, -800)

  shader(clouds)
  rotateX(PI / 2)
  plane(10000, 10000)

  pop()

  clearDepth()

  push()

  ambientLight(120, 120, 180)
  directionalLight(255, 250, 220, -1, 1, -0.5)
  directionalLight(200, 200, 200, -1, 1, -0.5)

  shader(buildingShader)

  translate(0, height / 2)

  for (const building of buildings) {
    building.draw()
  }

  pop()
}

The creative process


I've been yearning for a long time to replicate an experience like Flash where you can iterate between editing and coding in the same workspace. I'm happy to report that I've finally got a workflow that at least somewhat scratches that itch!


While certainly a lot of this could have been done the old way with more planning involved, it's quite freeing for me to be able to experiment with moving sketches around--maybe this visual would work better in this other part of the audio?--and then iterating on the visuals in that new context. It also let me quickly test out pulses in the code that match the beat of the music closely enough for the few seconds each scene is on screen that I didn't have to actually figure out the beats per minute of the music and convert that into frames.


So I'll definitely be doing more of this in the future. I also hope to eventualy capture more of the interactive parts of p5, such as mouse input, into Butter. Maybe one can record the mouse and then have it play back with the recorded values? Or maybe it should be keyframeable? Let me know if you have any thoughts on that or other things you'd like to use!
Tags:

8

Posted by Pahgawk - July 22nd, 2024


I realize I've just submitted an animation within one calendar day of my last animation. Wild. It's here if you want to see it:


So what's been going on in the mean time?


In the past year, more and more of my time has ended up dedicated to the creative coding community. It's a vibrant group of people who make art through programming. There are some visuals that actually lend themselves rather well to code, such as when you need to control a large amount of detail at once, or if you're interested in the emergent behaviour of systems. My day job is working on animation software where the building blocks are creative code sketches. The programming environment we build on, p5.js, I also help maintain, and a lot of my time goes into that. I'm happy to report that our local Creative Code Toronto meetups also have continued to run monthly.


While I still spend a lot of time on the engineering side (most recently, working on something for p5.js to make it easier to get into shader programming without doing a boatload of homework first), I find that a lot of my time goes into community management now. A lot of the engineering is in the design, and to a certain extent it's actually bad if I think go and implement it myself. At the very least, it's a missed opportunity: if I teach someone else how to implement a feature or fix a bug, they learn and can take on more responsibility; if I do it myself, I still only have myself to rely on next time. For an open source project that relies on volunteers and aims to let in anyone who wants to contribute, this kind of strategy is critical. It might not be the fastest way to build, but it brings more people along for the ride, and that lets you build something you couldn't have made otherwise. It's pretty rewarding, too! Nothing is better than seeing someone learn and then do cool things on their own.


Another big ish project I worked on this year was some software to automatically turn any city landmark into a version of the Chicago Bean ("Cloud Gate" if you want to be less cool) using some actual rendering and optimization techniques. This was made for SIGBOVIK, a conference taking place around April 1 for joke CS papers. I'm not sure if the Chicago Bean is funny to other people too, but I'm in too deep at this point. Learn how to make your own beans here:


This also isn't new exactly, but I updated some math I've been tinkering with for a few years on how to warp arbitrary 3D models in a shader. This is one of those things that technically you can already do using some other techniques, but they were either not as fast, or required annoying manual tuning. It seemed feasible to I went down this rabbit hole of doing some calculus to figure out exactly what would be necessary. Once you come out the other side, though, it's not too bad! We're going to use this in the animation software my work is building to be able to do some wiggly animations on any model you bring in without you having to rig it or wait for it to render. You can read a writeup of the math, or also listen to this talk from Creative Code Toronto about it.


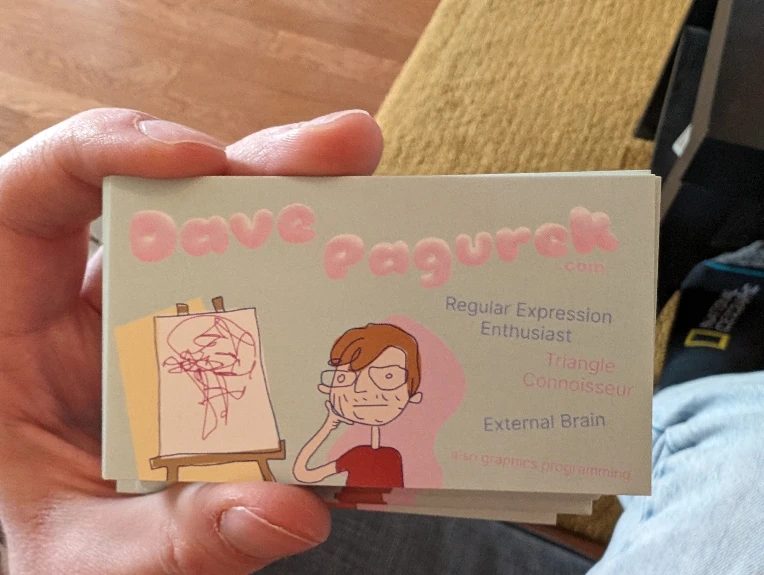
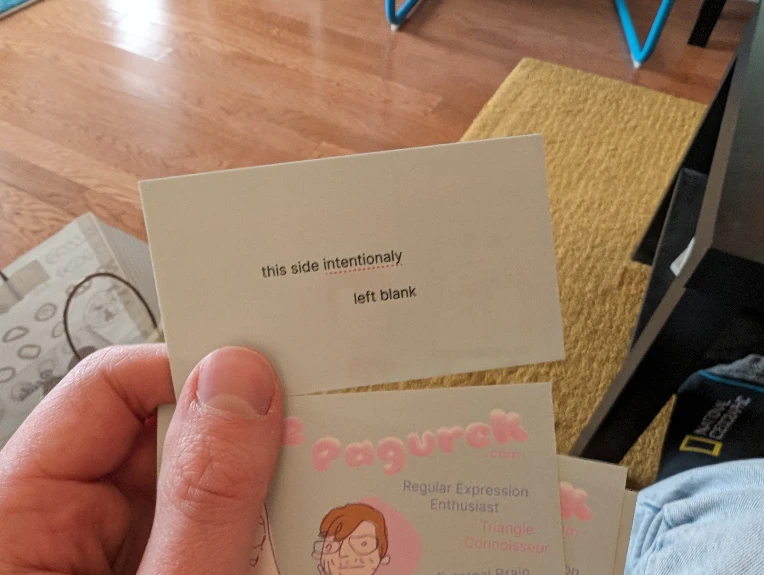
I've also finally made myself a dank business card. I've been saying I'd do this for a decade now, but they finally exist. They are barely legible. If you see me in real life, I don't have any serious business cards, so you may receive one of these instead. Probably prepares you better for what you're signing up for if you choose to do business anyhow. (I'll be at SIGGRAPH in Denver next week, if anyone else will be there!)

iu_1240433_2731551.webp

iu_1240434_2731551.webp


That's all for now. See you all in another year maybe? Or hopefully sooner, if we do another Toronto Newgrounds meetup!


-Dave


Tags:

3

Posted by Pahgawk - August 21st, 2023


If you're in the Toronto area, consider coming this Saturday to Creative Code Toronto! It's a monthly-ish meetup I run for people who make art with code. We have a very liberal definition of both art and code, and also we have free pizza.


Sometimes we have an open mic show-and-tell of cool stuff people are working on, but this time we have some talks! Here's what you're going to be seeing:


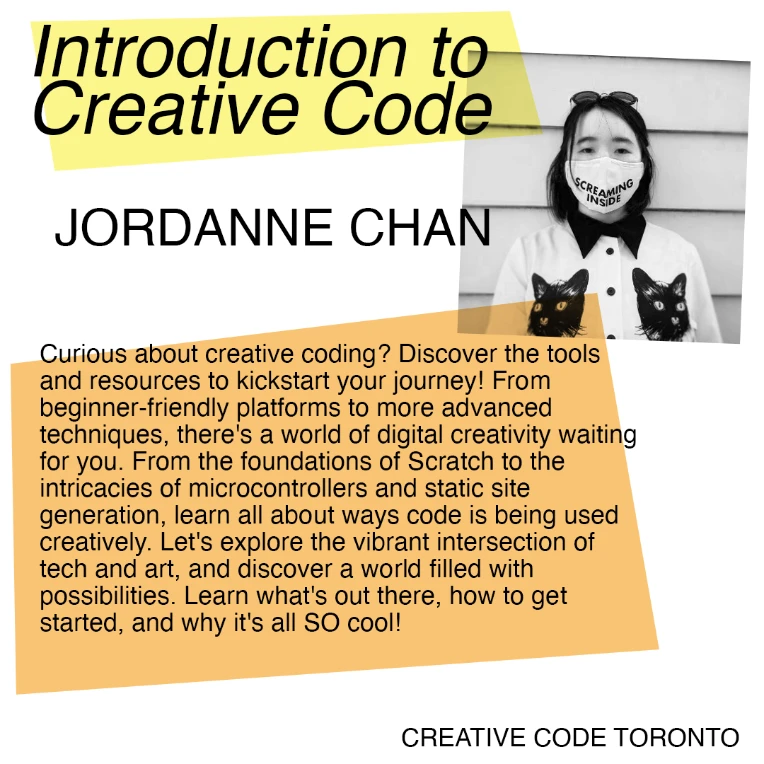
iu_1057111_2731551.webp

Jordanne Chan is a creative technologist, generative artist and STEAM educator who specializes in guiding both children and adults in workshops across Toronto's maker communities. Embracing the Geocities spirit, she passionately combines disciplines to ignite interest in creative coding, digital fabrication, and more.


iu_1057112_2731551.webp

Varun Vachhar is a DX Engineer at Chromatic and a contributor to Storybook. He specialize in component-driven development, design systems and generative art.


iu_1057113_2731551.webp

This one is me! Outside of Newgrounds I'm a graphics developer at Butter, a creative-code-powered video and motion graphics editor, and a developer for WebGL mode in p5.js.


If you're at all interested in making visuals with code, consider coming to the event! We've got a meetup here: https://www.meetup.com/creative-code-toronto/events/295383685/?utm_medium=referral&utm_campaign=share-btn_savedevents_share_modal&utm_source=link


Tags:

2

Posted by Pahgawk - July 22nd, 2023


It looks like the last time I posted something here was in 2020! It's been a while, Newgrounds. So why am I back again?


Short version

I'm back because I made a new video:


Long version

I live in Toronto now! The last time I posted, I was living in Vancouver working on a master's degree in computer graphics. I had hinted at this in the last life update, but I was struggling a lot with the lifestyle required by academia--I learned a lot, but the management style applied a lot of pressure, there wasn't the autonomy (or respect for time) that I would want long term, and I suppose I wanted to work on things for a different sort of audience than for other researchers. An opportunity came up to work on a startup halfway through my degree. I started working on it alongside my thesis, I graduated, and now I'm doing that full time.


iu_1029345_2731551.gif

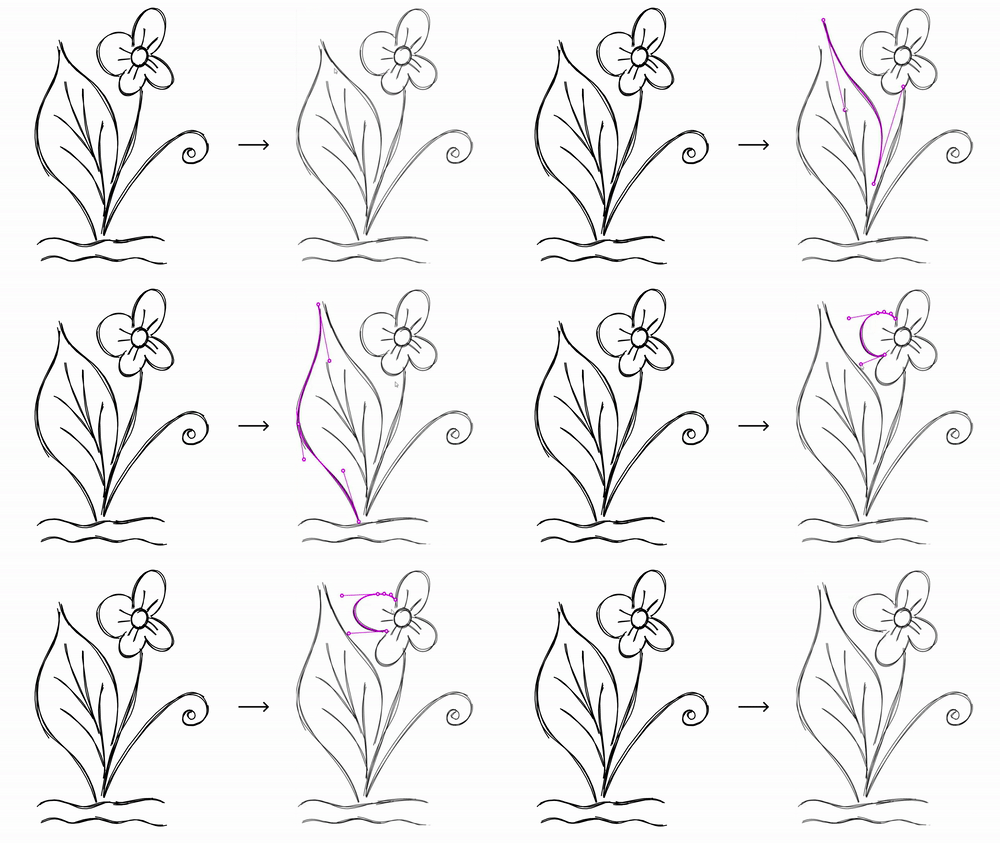
A screenshot from my thesis: given a sketchy drawing, my algorithm computed the stroke that a bundle of lines together represented, allowing one to edit a whole set of lines through just the controls of the "centerline." It's cool but requires a licensed quadratic solver in order to run, so it's not super practical to integrate into actual animation software unfortunately.


The startup is tiny, just three of us. We're working on building in-browser animation software for motion graphics. Initially, this is aimed at small businesses who need to make video content; we're trying to squeeze as much value and interesting motion as we can out of whatever assets one has lying around. The longer term goal ties in with the creative coding community: there are so many interesting visuals and animations being made with code (think of the credits sequence of The Queen's Gambit by beesandbombs) and we hope to be a platform to let that community combine their work with a more traditional video editor. I could go anywhere to work on this, but one of the developers lives in Toronto and I have some friends there, so I moved back East.


iu_1029354_2731551.gif

Using a component in our motion graphics editor.


Although our animation software is still in private beta (for now 👀), I've already been able to connect more with animators and graphics people than I could where I was before. We're using p5.js as a general-purpose JavaScript graphics library for developers to use, and we're investing a lot of time contributing to the library and its community. I personally have been putting a lot of time into its WebGL tools. The recent 1.7.0 release allows one to easily use framebuffer layers, letting you make stuff like this sketch, which uses 120 layers to time-offset each row of pixels to make your webcam look wiggly.


iu_1029352_2731551.gif

Turns out a lot of my computer graphics work involves getting stuff to wiggle.


Another part of that community-building process has been the creation of Creative Code Toronto, a meetup for creative people who use code to make art. So far we've run it like a show-and-tell for creative code projects. In August we're going to run two more with different formats: a work session and a talks session, so stay tuned for that!


One of the Toronto creative coders I met through this was none other than Newgrounds's own ninjamuffin99, which was kind of like meeting a celebrity! In any case, it got me thinking about Newgrounds again. I'm super happy to hear that this community, which was so instrumental in my becoming who I am now, is still alive and thriving. I was taking some time off this month for a vacation anyway, so I took the opportunity to go back to my roots a bit and make another animation. The result is the one at the top of this post.


iu_1029346_2731551.gif

Unrelated, but doing this also made me realize that tablets with a screen are cool and all but awful for my posture since I now look down rather than forward while drawing. I bought a stand for my tablet between starting and finishing this cartoon.


In the spirit of open source, I had initially started this in Blender. I contributed some code to Blender last year to help improve the gap closing algorithm in Blender's fill bucket, but I ran into some more issues with it this time around, so for now I've gone back to good ol' Flash CS6. (I can't update my old laptop or else that version will stop working--I guess I have to fix the Blender fill bucket by the time that laptop finally bites the dust.) In any case, it was fun to go work the way I used to for a bit.


Going forward

I can't promise I'm going to do any more of these any time soon. While fun, I've definitely got my hands full with other stuff, so I'll probably disappear for another year or so before releasing another.


I have been busy with other stuff, though!


There's an annual conference on April Fools for dank academic CS papers. This year I made a paper on how to fit jeans to any shape:


I used to work at Figma, and recently my former colleagues and I just got a patent approved for smart selection, a feature I worked on. So I guess I'm legally an inventor now?

iu_1029347_2731551.gif


Ok, that's all for now. I'm going to go to the Toronto Newgrounds meetup at the end of the month, so I hope to see some of you there!

-Dave


Tags:

7

Posted by Pahgawk - August 19th, 2020


I have a new video out again, the first thing longer than a minute that I've made in 7(!!!) years:


Also maybe relevant: I have a tiny behind-the-scenes into the art style. To summarize: draw using the pen tool, and after filling in your colours, enable Edit Multiple Frames, select all your drawings, and remove the stroke colour.


Now that that's out of the way... it seems I have a habit of disappearing for a year or more and then popping up again. This time feels different because I guess everything's changed? Here's what's happened between a year ago and March:


  • I moved to Vancouver and started my master's in computer graphics
  • I finished all the courses for my degree and did a sizable chunk of the work on a paper (more on this 🔜 hopefully! It's about assisting in line art cleanup)
  • I performed a live cover of Shake It Off that was low quality but high effort and a lot of fun (this crosses off a bucket list item)
  • I finally replaced my old Wacom Bamboo from 2008 (just because I realized that XP-Pen has on-screen tablets a lot cheaper than I expected them to be. 2008 Bamboo still works just fine!)


And then obviously the pandemic hit after that. Some things that have changed between March and now:


  • We did an online edition of TerribleHack where we pretended to be an awful new VR conferencing company
  • I did a lot more work on the paper and also decided that I probably don't want to have a career doing this, so after this degree I'm going to take the (thankfully many) learnings from all this and do non-academic graphics work. Luckily there is a market for this, and the expertise beyond regular software engineering that it demands is now something I can say I have with more confidence
  • I got back into drawing regularly and recording music (also on NG here now) and remembered how nice all that is
  • I realized it's a lot more fun to animate when there's no deadline and it's just done to relax (not even a self-imposed "I want this done before the next school term starts")


So I think I'm going to be regularly booking time to animate now, if only just to make sure I don't accidentally work 12+ hours a day on my actual work. Because I'm intentionally doing it slowly and for fun, that also means I'm not going to regularly have a lot of finished stuff to show. But that's alright, I feel like that only matters if you're trying to Make It Big and I think that would negate all the benefits I'm getting from this new setup.


I've also come across a job opportunity for after I graduate that would involve working remotely. A year ago I'm not sure I would have seriously considered it, but now it's like, I need to be good at that lifestyle regardless, so maybe it's best to just lean into it. It would also give me the flexibility to not move again, if that feels right, or to maybe move somewhere where there are actually other people I know for once. It's a weird feeling committing to never having an office to go back to at some vague point in the future, though. Does anyone do this? How's your experience been?


So that's where I'm at now.


Let me know what you all are up to! I've been awful at keeping touch and I do seriously want to know; if you send me links to videos and stuff I will watch them! And also I'm happy to help out with any graphics programming stuff anyone could use some help with.


5

Posted by Pahgawk - March 15th, 2019


What do you want to improve in your animation workflow?


Hello Newgrounds! It's been a while. I've been focusing on programming for a while now, and I've recently accepted an offer to start grad school at the University of British Columbia in the fall. While I haven't been actively making animations any more, I've kind of come full circle, and my work in computer science is now directly related to animation again. Specifically, I'm interested in how better software can help individual, independent artists make the higher quality animations, and I want to get some of your ideas to help guide this research!


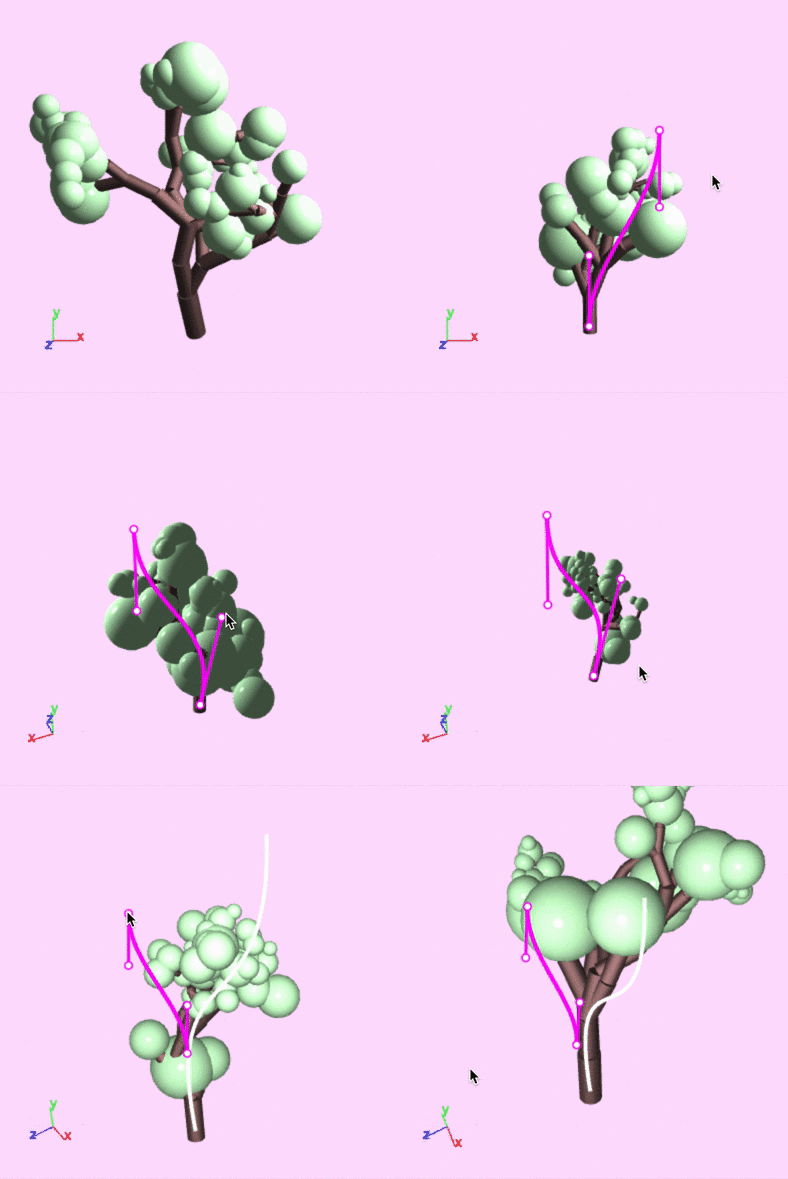
To give a sense of the sorts of things I've been looking into, let me talk a bit about my undergrad thesis. It's about procedural modelling, which is when you make a program of some kind that generates 3D models with random variations. This is useful when you want to make something that would be too tedious to do entirely by hand, like a forest or a cityscape. The idea is that you can just specify the pattern, and the computer can make a bunch of examples following the pattern. If making a program to solve this problem sounds like it's still a lot of effort, you're right! It is! And I've been trying to make incremental progress towards lowering that effort.


It's hard to describe a procedure that creates random instances of an object (such as a tree) without sometimes generating ones that look really bad (imagine one with all the branches off to one side.) It's easier to have a more relaxed generating program, but then search through the models it can make to find the good ones. My project lets artists sketch some rough curves that they want their model to look like, and a 3D model following the curves is picked in almost real time. Here's what it feels like to use:


iu_13546_2731551.gif


I wrote a longer article about this if you're curious about how procedural modelling works and where this fits in. Granted, writing the program to generate tree models still isn't the easiest thing in the world, but at least once you have one, I hope a tool like this would let you tweak and sculpt in a more natural way with the immediate feedback you've come to expect from your creative tools.


So I want to know what parts of your animation workflow, both in 2D and 3D, you think could use better software. Here's a dump of ideas I have so far:


From my own experience in 2D, the most time consuming part is just drawing every frame of character animation, but that's also the most fun part and maybe the part that gives the medium its characteristic feel, so I'm not sure that automatic in-betweening is the best use of my effort. Coming in second place is perhaps colouring and shading. Filling in outlines quickly isn't super flashy, but it's the sort of thing that could be automated and would probably save people a lot of time. Going beyond that, though, we could maybe do more than just flat shading. Flat shading and cel shading, while both respectable styles, were both introduced because they're efficient for humans to do. When we aren't using a human, we have the opportunity introduce more intelligent fill tools that explore different styles, possibly aware of lighting, or automatically texturing based on some examples you provide. Maybe the computer could also help add details like fabric wrinkles, so you can just focus on drawing the broader shapes. In all cases, this wouldn't replace a human artist, but would instead be another tool in the artist's toolbox. I think things like this are the most useful when you can tweak and interact with the results and you aren't just handed a final copy from some AI.


A lot of the things I focus on in 3D tend to be related to modelling of complex scenes, because that's something I find myself slowed down on compared to 2D. I wish I had more ways to quickly sketch and lay out a scene. My undergrad work might be helpful, but it still takes a lot of effort to create model generating programs, so perhaps another area of focus could be in creating a model generator based on a few hand created examples.


What do you you all think? Let's discuss in the comments! (Also if you're in the Vancouver region in the fall and feel like testing out stuff related to this, let me know!)


Life updates


Thanks for reading this far! I've been away from Newgrounds for a while, so if you're curious, here's what I've been up to.


Last summer, for a computer graphics class, I made a short animation based on a Debussy piano piece. I didn't upload it here because it's really just a small, unassuming video. The thing that took up all my time was the fact that it's actually just a C++ program I wrote that rendered the whole thing. This means that any keyframed animation had to be typed out without an interface, effects like water ripples had to be calculated mathematically, and the movement and bounces of light reaching the virtual camera had to be programmed. I also didn't have as much time to optimize it as more mature renderers have had, so to cut down on render time, it's not full HD and it's only 12fps. I've written about the more technical aspects if you want to learn more.


I spent some time recently working at Figma on some projects like the smart selection tool so that working with designs with grids and lists can be a little easier. I'm back in school again for a while now, but I find I've just been using Figma in place of Illustrator these days. The rate of improvement is great and also it's free for students! Maybe check it out if you ever find yourself needing to design something.


I run this thing at the University of Waterloo called Terriblehack where we work on shitty projects. It just happened this past Sunday. I made a little space simulator, but where the Earth is flat.


I also have a "band" that consists of me and whoever I live with at the time, and we record shitty cover songs. We're called Don't Cross Me and our gang sign in the cross product right-hand rule. We've got a SoundCloud if you want to experience our music. We're hoping to maybe do another song this weekend (Boulevard of Broken Dreams, anyone?)


3

Posted by Pahgawk - June 8th, 2017


Recently I went about making a 3D renderer (specifically, a raytracer.) Before researching, it seemed like a daunting task, shrouded in the promise of complicated math and a variety subtle, deeply-hidden bugs. As it turns out, there is a fair amount of linear algebra, and it is hard to tell if your glass rendering is weird or if glass itself is just weird. That said, the core concepts are more accessible than I thought they would be. Having used a 3D rendering system before as an artist, I found it particularly interesting seeing how it worked from the inside, and I thought maybe the joint artist/programmer community of Newgrounds might find it interesting too.

My code examples are in Swift because that's what I used to write my renderer, but the concepts are universal. (Also, is there a way to add monospace text to a Newgrounds news post?)


What is 3D rendering, anyway?

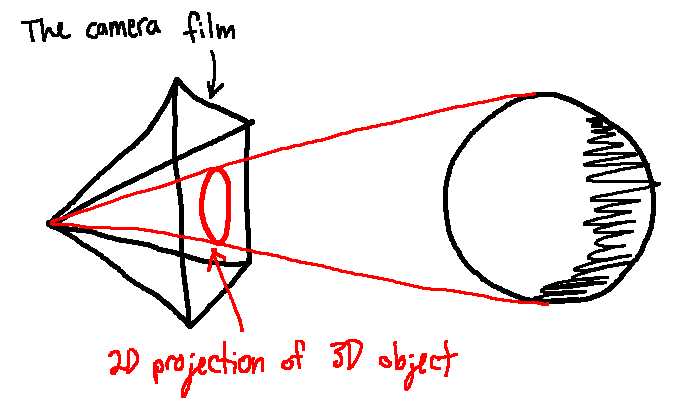
We can think of the camera as a 2D rectangle in 3D space. It's like the film of a camera: when a photon hits this rectangle, we see its colour value in the location that it hit the film. The image we get from a camera is a 2D projection of the 3D world onto the rectangle of that piece of film.

2731551_149697144163_projection.png

You can draw a line from a focal point behind the film to a point on an object. Where that line intersects the film is where the projection of that point in 2D will be.

The end goal of a 3D renderer is to make that 2D image of 3D space.


How does raytracing fit in?

There are plenty of ways you can write a 3D renderer. Some of them are better suited for fast render times for applications like gaming. Others, like raytracing, take longer to compute but can often model reality more realistically. Raytracing can take into account more complicated reflections of light off of other objects, soft shadows, lens blur, and more.

In real life, light is emitted from a source as a photon of a certain colour. It then will travel in a straight line (well, mostly) until it hits something. Then, one of a few things can happen to the photon. It can get reflected in a direction, its path can be bent from refraction, or it can be absorbed by the material. Some of the photons eventually bounce their way to a camera, where they are "recorded."

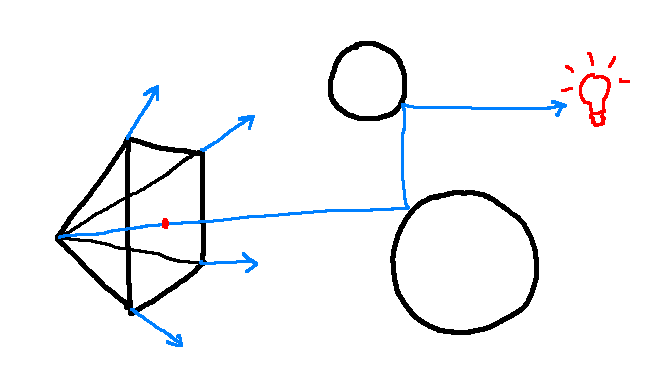
Raytracing models this behaviour, but in reverse. Photons are cast from the camera, and bounce around the surfaces in a scene until they hit a light source. At that point, the photon's colour is recorded. It would also work if you cast rays from light sources to the camera, like in real life, but this tends to not be as efficient since so many photons just won't reach the camera.

2731551_149697144151_cast-bounce.png

Starting from the focal point and going through a coordinate (x, y) on the film, a ray is cast, which bounces until it hits a light source to find its colour.

So, for each pixel in the image you want to render, here's what we do:

  1. Cast a ray of white light from a pixel
  2. Find the first object the ray intersects with
  3. If it is a light source, multiply the ray's color with the light source's colour to get the pixel colour
  4. Otherwise, reflect, refract or absorb the ray, and go back to step 2 with the resulting ray


Modelling geometry

Here's where some math happens. How do we determine if a ray hits an object? First, let's model a ray. A ray in 3D space can be defined as a direction vector, and a point that it goes through. Both this 3D point and vector can be represented by an (x, y, z) coordinate, but we're actually going to use a 4-vector (x, y, z, w).

Why the extra coordinate? You can certainly use a normal 3-vector, but then it's up to you to keep track of which 3-vector in your program is a point and which is a direction. If you use a 4-vector, though, w = 0 implies that it is a direction vector and w = 1 implies that it is a point, which makes things work out pretty nicely. If you add a point and a vector, their w coordinates add to 1 + 0 = 1, meaning the result is still a point. A vector minus a vector is still a vector, and 0 - 0 = 0. A point minus a point is a vector, and 1 - 1 = 0. A point plus a point doesn't make sense, which would leave you with a w value of 2, which is also unexpected. When we use transformation matrices later, they Just Work™ with this way of modelling points and vectors (for example, scaling a vector changes its size, and scaling a point does nothing.) It's convenient.

So, we've got this definition of a ray:

  struct Ray {
    let point, direction: Vector4
    let color: Color
  }

Then, for any given point on the film and focal point behind the film, we can cast an initial ray:

  func castRay(from: Vector4, through: Vector4) -> Ray {
    return Ray(
      point: from,
      direction: through - from,
      color: Color(0xFFFFFF) // Start with white light
    )
  }

To see if it intersects with an object, we need an object to model. A sphere is a nice one, since we only need a few small pieces to represent it:

  struct Sphere {
    let center: Vector4
    let radius: Float
  }

We can then make a function pretty easily to check whether or not a ray intersects with a sphere by using the equations given in the Wikipedia article for line-sphere intersections. We can make it return an Intersection (the point of intersection and normal from the surface at that point) if it exists, or nil otherwise. If we have multiple spheres, we want the first one the ray intersects with, so you can iterate through the spheres and take the one that's the shortest distance from the ray origin. Obviously this isn't the most efficient, but works for small scenes:

  struct Intersection {
    let point, normal: Vector4
  }

  func firstIntersection(ray: Ray, spheres: [Sphere]) -> Intersection? {
    return spheres.flatMap{ (sphere: Sphere) -> Intersection? in
      return intersectionBetween(ray: ray, sphere: sphere)
    }.sorted{ (a: Vector4, b: Vector4) -> Bool in
      (a - ray.point).length < (b - ray.point).length
    }.first
  }


Modelling materials

Once we've found an intersection, we are tasked with bouncing the light ray. How this happens depends on the material the ray intersected with. A material, for our purposes, must be able to take an incoming ray and an intersection and return a bounced ray.

  protocol Material {
    func bounce(ray: Ray, intersection: Intersection) -> Ray
  }

How the ray gets bounced affects what the object looks like. To make shadows, we know that some photons need to get absorbed somehow. Each time a ray is bounced, we can dim the intensity of the light of the outgoing ray a bit (for example, multiply the red, green, and blue fields by 0.7.) The more bounces the light goes through, the darker the colour becomes. If no intersection is found, we can multiply the light colour by some background colour and stop bouncing, as if there is sky in every direction as a source of photons.

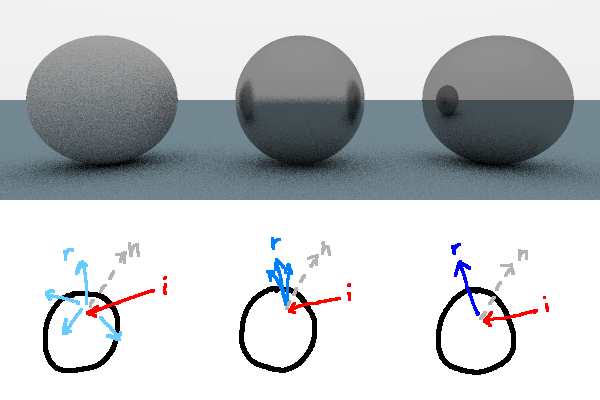
If a ray does hit an object, we have to think about what direction we want to bounce the ray in. Reflective materials abide by the tenth grade science class mantra, the angle of incidence equals the angle of reflection. That is to say, if you reflect the incoming ray about the surface normal, you're going to make a mirrorlike material. If instead you choose to reflect the light in a totally random direction, you've diffused the light and mate a matte material (although, make sure you absorb the ray if it is randomly bounced into the inside of the sphere.) A surface that reflects rays but with a little bit of random variation will look like brushed or frosted metal.

2731551_149697144071_materials.png

The more random variation there is in the bounced ray, the more matte the light on the material looks.


Monte Carlo rendering

You'll notice that the scene looks pretty grainy, specifically around areas that should be blurred. This is because, for each pixel, we randomly bounce a photon around. It's bound to not be quite smooth because of the random variation. To make it smoother, we can simply render each pixel multiple times and average the values. This is an example of a Monte Carlo algorithm. From Wikipedia, a Monte Carlo algorithm "uses random numbers to produce an outcome. Instead of having fixed inputs, probability distributions are assigned to some or all of the inputs." The more averaged samples we take of the image, the closer to an actual "perfect render" we get. The random grains, averaged together, end up looking like a smooth blur.

We can make more complicated materials with this sampling technique by having it, for example, reflect a photon some percent of the time and refract it the rest of the time. Having a higher probability of reflecting at steeper angles is a good way to create realistic-looking glass. You can make glossy materials by having a small probability of reflection and a higher probability of diffusing the light.


Motion blur

Another cool thing we can do using the Monte Carlo technique is create motion blur. In real life, cameras have their shutters open for a real, non-infinitesimal amount of time. The longer the film is exposed to photons, the more photons hit it, and the brighter an image you get. If an object is moving while the film is exposed, photons reflected from all points in time along the object's trajectory will end up on the film, resulting in the object appearing smeared.

We can model this in our raytracer, too. Let's say a sphere moves from point A to point B while our virtual camera shutter is open. For every ray we cast, before we check for intersections between the ray and the sphere, we pick a random point along the object's trajectory for it to be at, and use this version of the object for collisions. We use a different random location for the next ray. After doing enough samples of this, we should end up with a nice blur.

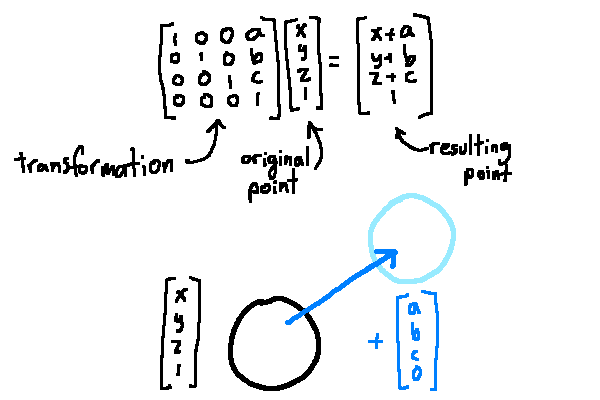
In order to actually implement this, we need to represent the object's motion. A transformation matrixworks well for this purpose. When you multiply a matrix by a vector, you get a different vector. A simple one is the translation matrix:

2731551_149697144013_transformation.png

Applying a translation transformation to a point to produce a new point

The end result is a shifted coordinate. You can also create rotation, stretch, and skew matrices. By multiplying matrices together, you compose the transformations. You can invert a transformation by inverting its transformation matrix.

So, back to our motion blur. The camera shutter is open as an object moves from A to B, and we can represent A and B using transformation matrices. If you want to find a version of an object at a random point on its trajectory to check collisions with, you can interpolate between them:

func randomOnTrajectory(object: Sphere, from: Matrix4, to: Matrix4) -> Sphere { let amount = randomBetween(low: 0, high: 1) let transformation = from*amount + to*(1-amount) return Sphere( center: transformation * object.center, radius: object.radius ) }

That gives you a result like this:

2731551_149697144033_blur.png

A sphere moving across the x axis while the virtual shutter is open


Parallelizing

Because it takes multiple samples to get a good looking result, it would make sense to try to get as much throughput as possible while rendering. The great thing about raytracing is that each sample is calculated completely separately from other samples (there's a technical term for this, and it is, no joke, referred to as "embarassingly parallel".) You can concurrently map by running each sample in a separate thread, and when each is done, reduce by averaging them into a final result.


Going further

After implementing everything so far, there is still plenty that you can add. For example, most 3D models aren't made from spheres, so it would be helpful to be able to render polygonal meshes. By jittering the angle of each ray cast slightly, you can make a nice depth of field effect where objects closer and further from the camera than a focal lenth appear more blurred. You can try rendering gaseous volumes rather than just solids. You can subdivide the space in front of the camera so that you don't have to check collisions with every object on the screen.

The code for the raytracer I wrote is available on GitHub for reference, although it is also still a work in progress. It's incredibly rewarding to write programs like this where the feedback is so visual, so I encourage you to try it yourself too! I hope the topics I've covered so far are enough to shed light on what goes into raytracing. Pun intended, of course.


Posted by Pahgawk - April 4th, 2017


Hello again, it's been a while! I made an animation for the first time in a few years:

So how did I arrive here? Why did this take so long?

Well, let's go back to high school. After finishing NATA in 2013, I was pretty burnt out. I was also bogged down with work, stressed, and depressed. In 2014 I was graduating high school and starting university, so I started making another animation about that process of moving on. I was setting out to make a coming of age story as someone who hadn't really gone through that process yet myself. I wanted the scope to be larger than something I'd make in a month for NATA, too, so it was larger and more ambitious than I was used to. Needless to say, I never finished it. I think I have the source files lying around somewhere so maybe one day I'll come back to it, after revamping the story. But it's unlikely.

I went to the University of Waterloo for software engineering. I've made posts on here before about programming, so it's nothing new that that's something I have a lot of interest in. It took a while to get into the flow of university life, though. Although I like what I do, programming took up all of my time. My university program is a little weird. It's a five-year program where every four months, we alternate between a school term and a term interning at a company. We don't get summers off. In order to get the sorts of work experience I wanted, I had to (and also wanted to) spend a lot of my time improving my programming skills. I think I've come a long way, and I've made a lot of things I'm proud of. My end goal is to bring computing back to the arts at some point, so I've been doing some computer graphics stuff recently. I made a raytracing 3d renderer that can do stuff like focal blur and motion blur, so that was a big learning experience. Recently I also made a thing where you put in a midi file and it plays All Star to the tune of the midi as a project for TerribleHack, a hackathon I helped start in Waterloo where you take a terrible idea and make it. I've worked at Shopify, Athos, and Remind so far, and I'm going to be working at Google in Mountain View this summer. I've been busy, clearly.

It took a while, but I'm at a point again where I tihnk my life is in pretty good shape. I'm feeling better than I have in a long time, I'm doing stuff that I love, and I'm working with great people. Part of having your life in order seems to be getting a bit of free time. I sort of stopped posting it to Newgrounds, but I haven't stopped making music this whole time (maybe I'll start uploading those again.) I also make crappy, sarcastic cover songs with my roommates every term. And, recently, I started making animations again.

I've made small looping animations as jokes with friends, but I hadn't really made anything significant (defined, to me, as "longer than 30 seconds and with sound maybe") until recently. I'm taking a public speaking course to get an English credit, and we had to make a video essay for one assignment, so I ended up making this:

What can I say, I liked the feeling of making things. So I tasked myself with making an actual animation again. I tried to keep the scope small to make sure I'd actually finish, and the animation I released today was the result. Interestingly, my animatino style changed a bit. At first I thought my drawings were shakier, but I've come to realize that that isn't entirely true. In the past, I'd have a separate layer for the heads of characters, where I would drag around the same drawing on top of the frame-by-frame animated body. This way, the shape of the head barely ever changes, and it doesn't look shaky. Now, I don't like the feeling of dividing everything up into a million layers and making everything pristine, so I generally have one layer per character and I redraw everything. So my animation isn't any shakier than before, but since it's all being redrawn, including the head, it visually looks a bit shakier. Which is alright, it's a looser style, and I think it allows for freer acting.

I also learned you can import video into Ableton Live so you can sync up sound to video. If you use Ableton and don't use it to score your movies, I highly recommend it. I feel like I've been doing audio editing in the dark ages up until now.

Anyway, don't expect things from me too frequently, but I don't think I'll be gone for as long this time. Animation is a big part of my identity and I'm glad to be back.

- Dave


Posted by Pahgawk - July 31st, 2015


Hey guys, turns out this weekend is a long weekend for me, so that means you have until Sunday night to send in entries for the Sarcastic Body Language Collab. 

Rules are here: 

http://pahgawk.newgrounds.com/news/post/937030


Posted by Pahgawk - July 17th, 2015


UPDATE: deadline is August 1st. I promise I will get the deadline right the first time next time!

Hey guys, a round of NATA just finished, that means it's time for a new collab!

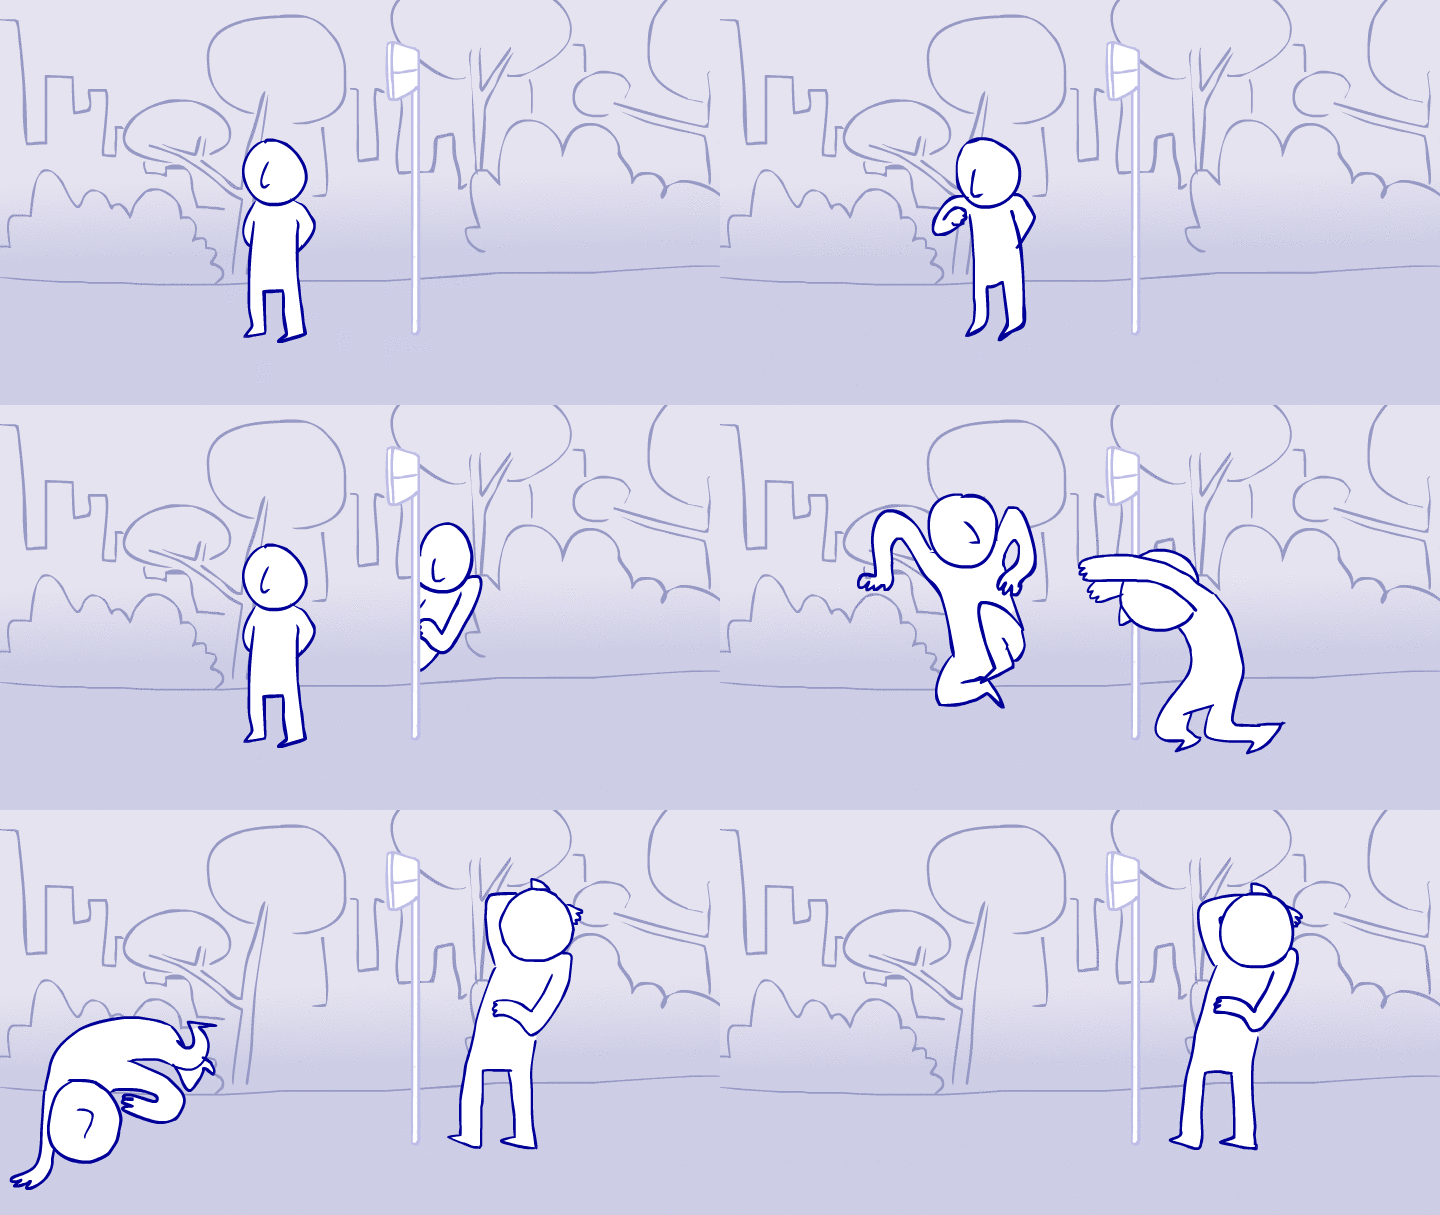
The theme this time is body language: try to have a character show some emotion without giving them any recognizable facial features! Here's mine, for reference:

2731551_143760601532_scare.gif

The deadline will tentatively be set for the 1st, with the possibility of extension (tell me if you need more time!)

The usual rules:

  • Anyone can join, even if you're not part of NATA!
  • The Flash project is 720x405, 24fps (although if you make yours at any 16:9 ratio, we can scale it)
  • You don't have to use Flash either. As long as it's the right size and frame rate, you can just send me a video file. Don't worry about conversion, I'll handle that (but in case you really want to, I convert to 720x406 flv. It doesn't seem to like having an odd number of pixels in the height.)
  • If you send me a .swf, do not use MovieClips with nested animations or filters as they won't import. Graphics are fine.
  • If you send me a .fla, then MovieClips work.
  • In general, try to avoid filters like blurs and glows. On the menu page with all of the animations, those in particular are expensive and slow things down. If you really need them though, we can export a video and use that without any issue.
  • We don't use sound (the collab has background music and also all of the entries are shown together on the menu.)
  • Aim for a short animation or loop less than 15 seconds (this is more of a guideline than a rule)

Here's our last collab for reference.